


3 Different Ways to… Enable and Disable Tool Containers
This post sets out three different ways to change the behaviour of a tool container using a radio button in the app interface. The use case for this is with analytic apps where depending on the user’s selection you want different parts of the workflow to run.
So here I outline the way I was taught (by using the action tool) and two alternatives as suggest to be by Nicole Johnson (@The_Real_NJ) and Chris Lewis (@4loveofAlteryx).
#1 – Dummy Radio Button
When you connect a radio button to a tool container with the action tool, the behaviour driven by choosing the radio button is to disable the tool container.

While I personally find this unintuitive, as I’d expect selecting the radio button to be an affirmative action, the way to make it clear to the user in the app what they want to do is to add a second ‘dummy’ radio button which is selected by default.

The advantage of this approach is that when the radio button to ‘Enable the container’ is selected it forces the other radio button to not be selected, therefore it doesn’t disable the container. And voila it gives the user an option to enable / disable (or should I say disable / enable!) a part of the workflow.
#2 – Conditional Method
This approach was suggested to me by Nicole.

By using a condition tool it means that in the analytic app you can have a single check box instead of two radio buttons which makes for a cleaner app experience. Plus the action of ticking the box (the affirmative action) enables the tool container and unchecking disables the tool container.
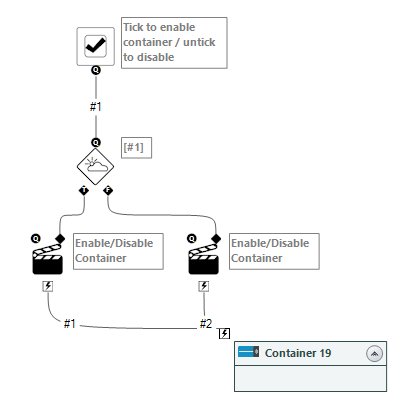
When configuring the condition tool, you just need to set the input connection from the check box [#1], when means that when the check box is ticked the expression is true, and when it’s unselected it’s false.

From there you set up two action tools, where the configuration of the action tool to me is much clearer where the user can specify whether the action is to enable or to disable the tool container (however this isn’t completely fool proof as you’ve got to remember to go in and change the action tools to have different behaviours!)


#3 – Update Formula
This method was suggested to me by Chris Lewis.

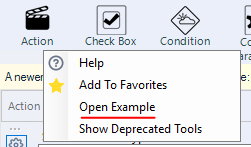
It took me initially a bit of time to work out how to set this one up, but a tip is a lot of the tools have an option to open an example, and for this one how to do this is demonstrated in the check box example workflow.
From looking at the configuration in the example, I discovered that you can update the behaviour by using a formula within the action tool from the default of false (i.e. the container is enabled) to true by using a simple IF statement (you can use the IFF syntax to write it in the same way as you would in Excel):
IFF([#1], "False", "True")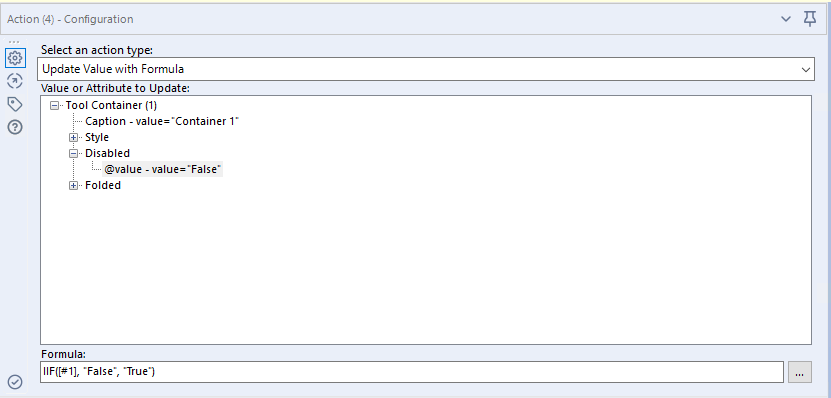
Like the method of using a Condition tool suggested by Nicole, this logic with this approach seems sensible. However compared to the earlier option it requires fewer tools on the canvas, which to me is a benefit as I typically move all my interface tools to the top of the workflow and use wireless connections, however some may find the syntax of the IIF statement a bit confusing as the [#1] evaluates to true when the radio button / check box is selected (turned on) and false when deselected (turned off). Whereas using the condition tool by incorporating two distinct actions makes it clear what happens when it’s selected / deselected.


